


I use photo shop I got cs2 and advanced cs3 editor.. now Im going to do a quick tutorial for those that are new to photo shop showing off my sig from scratch,Im sig maker for Shinobi clan hope it hels someone...enjoy
Ok i thought we should start with this hope u guys enjoy it.
If its too advanced or not advanced enough I appologise, any feed back will help me know where evry one is at.
there it is hope u like it.
create new
300X100
72dpi. ( Always 72 dpi unless printing )
rgb ( Always rgb unless printing )
Press F ( short cut key 2 view in full screen)
some times this is already the defalt view, press F a few
times just to see
what it does, find a view u like working with.
select layers tab and double click layer 2 unlock it, name
this layer clouds
( personal preference of mine 2 also colour the layer, just
makes it easier
to find when u have 100’s of layers)
now in the colour palette pick some sky colours, ive picked
blue and white
but it doesnt mater what u pick
now from the menu click filter - Render - Clouds
( if u ure clouds dont look that good press ctrl - F as
many times as you need till u get the desired clouds )
now duplicate the cloud layer so u have 2 of the same
layer.( in the layer menu it will say duplicate, or in ure layer window u can drag the layer u wish 2 duplicate down 2 the page image at the bottom of the
window)
select the top layer ( should already be selected )
and change the layer blend to colour burn or linear burn, the idea is 2 make some contrast.
Ok now press the type tool ( T ) and click on the image and type a word
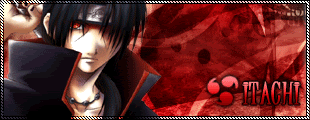
4 this exercise i used the word SHINOBI.
the typeface u choose is up 2 you try 2 make it a bold type face, as theres more detail in the effect that we do to the type
after youve chosen your typeface, press ctrl - T this will bring up the
transform borders. hold down shift ( keeps evrything in proportion )
and click and drag on a corner until u have the desired size, press enter.
( if its not white already highlight the text and change 2 white now )
Ok now comes the fun part , layer styles, u can download these on line but i say make ure own its more fun.
double click on ure shinobi layer
(here u can crete your own styles that u can add to any image one u save them)
select blend mode , choose colour burn
choose the bevel and emboss - innner bevel, smooth, u can play with the depth,
size and soften till it looks roundish ( play around till u get what u want
each typeface is different.
choose drop shadow, tab distance 9, size 9
choose outer glow tab .............
choose satin tab .............
now ure nearly done go to the top tab “Blending options” at the very top and click the new style button,
call it glass or clear or what ever. click ok. now u have a style that u can use in the future if ever u need a clear glassy look.
link all the layers that youve created by clicking in the boxes
underneath the paint brush......
then on the layers tab u will notice a small arrow, click this arrow and choose merge linked.
now u should have one layer
now from the menu choose filter - artistic - plastic wrap, u can see in the image preveiw what this does, play with the settings till u have what u want , it dosent realy mater what u chose it will look cool
now duplucate the layer and change the layer blend to vivid light
now ure done congratulations
press F and then tab to veiw ure image in all its mighty glory lol.
Short cuts used..........
T = type tool
Ctrl T = this is the shortcut for transform, alows u to change sizes
Shift = this alows u to keep things in proportion
F = change the veiw
Ctrl F = this redoes the filter u have chosen
 AnimeGalleries [dot] Net AnimeGalleries [dot] Net |  AnimeWallpapers [dot] Com AnimeWallpapers [dot] Com |  AnimePedia [dot] Com AnimePedia [dot] Com |  AnimeGlobe [dot] Com AnimeGlobe [dot] Com |


Bookmarks